Best Fish Finder Under $500 for Reservoir Fishing
It can feel like you need to take out a second mortgage just to get decent electronics for your boat these days, especially when you start looking at those high-end fish finders that seem to do everything but reel in the fish for you. But let's be real, most of us aren't professional anglers with unlimited budgets. We just want to find fish, plain and simple, without breaking the bank. This guide is here to show you that you absolutely can get a powerful, effective fish finder for reservoir fishing in Oklahoma without spending more than $500, focusing on the features that truly matter for our local waters.
Why a Budget-Friendly Fish Finder is a Smart Choice for Oklahoma Anglers
When you're out on the vast expanses of Lake Eufaula or navigating the timber of Lake Texoma, a reliable fish finder isn't a luxury; it's a necessity. But the good news is, "reliable" doesn't have to mean "expensive." Many anglers fall into the trap of thinking they need every bells and whistles feature, only to find they rarely use half of them. For under $500, you can equip your boat with technology that will dramatically improve your success rate without emptying your wallet.
Getting the Most Bang for Your Buck
The sweet spot for budget-friendly fish finders often lies in finding models that excel at core sonar functions without adding costly advanced networking or touchscreens that might be overkill for your needs. Think about what you really need: clear views of fish and structure, reliable depth readings, and maybe some basic navigation. Anything beyond that, while nice, can quickly push the price point out of reach for many of us who just want to enjoy a good day on the water.
You might be surprised at the capabilities packed into these more affordable units. Manufacturers like Humminbird, Lowrance, and Garmin have recognized the demand for accessible technology, offering streamlined versions of their top-tier units that still deliver exceptional performance. It’s all about focusing on the essentials and getting maximum value for those hard-earned dollars. What's more, a simpler unit often means less time fiddling with settings and more time fishing.
Dispelling the Myth: Expensive Doesn't Always Mean Better
There's a common misconception that if a fish finder isn't costing you a grand or more, it's just a toy. This couldn't be further from the truth, especially for reservoir fishing in Oklahoma. Our lakes, while diverse, often present scenarios where a solid 2D sonar and a good down-imaging view are perfectly sufficient. You don't necessarily need side-imaging to find brush piles in a cove or follow a creek channel, though it's certainly a nice bonus if you can find it in your price range.
Consider a scenario: you're trying to locate schooling white bass on Keystone Lake. A fish finder under $500 with a crisp 2D sonar can easily show you those bait balls and the fish feeding beneath them. Or perhaps you're targeting crappie suspended around submerged timber in Fort Gibson Lake. A unit with quality down imaging will render that timber with remarkable clarity, allowing you to pinpoint where the fish are holding without needing to see 100 feet to either side of your boat. For many common fishing situations, a well-chosen budget fish finder performs just as well as its pricier counterparts.
Key Features to Look for in a Budget Fish Finder
When you're trying to decide on the best fish finder for under $500, it can feel like you're learning a new language. Terms like "chirp," "megahertz," and "transducer cones" get thrown around, making it all a bit overwhelming. But really, it boils down to a few critical components and features that will make the biggest difference in your fishing experience. Knowing what to prioritize will help you navigate the options and pick a winner.
Screen Size and Resolution
Let's be honest, nobody wants to squint at a tiny, pixelated screen all day. When you're trying to discern a subtle fish arch from bottom clutter, a clear, readable display is paramount. For under $500, you can typically find units with screen sizes ranging from 5 to 7 inches, which is generally quite sufficient for most boats and kayaks. A 7-inch screen offers a comfortable viewing experience, allowing you to easily see both your sonar returns and any mapping you might be using.
Beyond size, pay attention to resolution. Higher pixel counts mean a sharper image. While you might not get the ultra-high-definition screens found on top-tier units, many budget-friendly models offer resolutions that provide excellent clarity, especially with 2D and down-imaging sonar. Look for screens that are also bright enough to be visible in direct sunlight, which is a common challenge on sunny Oklahoma days. A good screen can be the difference between confidently identifying a fish and second-guessing every blob on the display.
Transducer and Sonar Technology
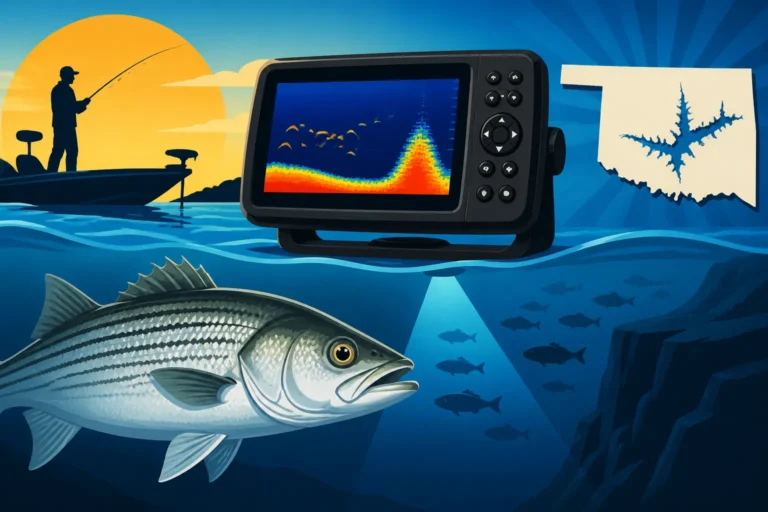
The transducer is the heart of your fish finder – it's the part that actually sends and receives the sonar waves. The quality and type of transducer bundled with your unit will dictate the kind of sonar views you get. For under $500, you should definitely be looking for units that offer at least good 2D sonar and down imaging. Fish Finder Features That Matter Most on Oklahoma Reservoirs really highlights how crucial this is.
- 2D Sonar (CHIRP): This is your traditional sonar view, showing fish arches and bottom contours. Modern CHIRP (Compressed High-Intensity Radiated Pulse) sonar is a game-changer, offering much better target separation and clarity than older fixed-frequency sonar. It's fantastic for finding schools of baitfish or individual game fish in the water column.
- Down Imaging/DownScan: This technology provides a picture-like view directly below your boat, making it incredibly easy to identify submerged trees, rock piles, brush, and even individual fish nestled within structure. For picking apart cover in Oklahoma's timber-filled lakes, this is invaluable.
- Side Imaging/SideScan (Optional but Possible): While often a premium feature, some manufacturers occasionally offer entry-level side imaging units for just under the $500 mark, especially during sales. Side imaging lets you see out to the sides of your boat, scanning a wider area for structure and fish. If you can find a unit with this feature in your budget, it's a huge bonus for covering water quickly and locating hidden gems. Best Side Imaging Fish Finder for Bass Fishing often recommends units that can be slightly above this price point, but sometimes deals pop up for more basic models.
GPS and Mapping Capabilities
For navigating our vast reservoirs, a built-in GPS is almost as important as the sonar itself. It allows you to mark waypoints where you've found fish or interesting structure, save your favorite fishing spots, and navigate back to the boat ramp in foggy conditions. Even on budget units, you can expect basic GPS functionality.
Many fish finders in this price range will come with a basic map or a blank canvas where you can draw your own. Some might even include rudimentary contour maps of major lakes. If you frequently fish the same reservoirs, like Grand Lake or Lake Murray, having a unit that can accept upgraded mapping cards (even if it's an extra purchase down the line) is a huge advantage. This allows you to dive into detailed contour lines and navigation aids, making your fishing much more efficient. Check if the unit has a micro SD card slot for this purpose. You might also want to consider if Do You Need a GPS Fish Finder for Oklahoma's Big Lakes? for your specific needs, but for general reservoir fishing, it's highly recommended.
Understanding Different Sonar Technologies
The world of fish finders can seem like a confusing alphabet soup of acronyms: 2D, CHIRP, DI, SI, traditional, broadband. But once you break down what each technology does, it's really quite straightforward. For anglers sticking to that under $500 budget, you'll primarily be dealing with a combination of 2D CHIRP and Down Imaging. Understanding these will empower you to interpret what you see on the screen and put more fish in your boat.
Traditional 2D CHIRP Sonar
This is the bread and butter of fish finding, and it's come a long way from the old flasher units. Modern 2D sonar, especially with CHIRP technology, sends out a range of frequencies (instead of a single one) and then processes the returns. What does that mean for you? Much clearer images, better target separation, and the ability to distinguish between a single large fish and a tight school of smaller ones.
On your screen, 2D sonar will typically show you arches (indicating fish), solid lines or blobs (indicating bottom structure or dense schools of bait), and varying shades of color to show signal strength. Hard bottoms, like rock or packed clay, will usually appear as a thicker, more intense band, while softer bottoms, like mud, will be thinner and less distinct. This view is excellent for seeing fish suspended in the water column, tracking your lure, and getting a general idea of depth and bottom composition. It's your go-to for finding those wide-ranging schools of white bass in the spring or scanning for suspended crappie over deep brush.
Down Imaging and DownScan Technology
This is where things start to get really visual and intuitive. Down Imaging (often called DownScan by Lowrance or DownVu by Garmin) gives you a photographic-like view of what's directly underneath your boat. Instead of arches, fish will often appear as bright dots or streaks, and structure like trees, brush piles, and rock formations are rendered with amazing detail, almost like an underwater photograph.
If you're fishing a lake like Broken Bow with its clear water and abundance of submerged timber, Down Imaging is your best friend. You can literally see the individual branches of a sunken tree and pinpoint exactly where those bass or crappie are hiding. This technology uses a very narrow, high-frequency beam, which creates that incredible detail but covers a smaller area than traditional 2D sonar. It's not about finding fish far away, but about precisely identifying what's directly below your boat. Combining 2D and Down Imaging on a split screen view is a powerful strategy, giving you both the broad overview and the detailed close-up simultaneously.
Side Imaging and SideScan (The Dream Feature)
While less common in the under $500 bracket, it's worth understanding Side Imaging (or SideScan). This technology casts beams out to the sides of your boat, allowing you to scan a wide swath of water and bottom structure without driving directly over it. Imagine cruising down a lake, and your fish finder shows you a brush pile 50 feet to your left, complete with fish holding around it. That's Side Imaging.
For anglers who cover a lot of water on big lakes like Lake Texoma searching for Best Fish Finder for Deep Water Striped Bass on Lake Texoma, side imaging can be incredibly efficient for scouting. It excels at finding offshore structure, creek channels, and even large schools of baitfish over expansive flats. If you stumble upon a deal for a unit with basic side imaging under $500, it's usually worth stretching your budget a tiny bit if you can manage it, as it significantly enhances your ability to locate new spots. However, if it pushes you too far over budget, remember that excellent fishing can still be had with just 2D and Down Imaging.
Here’s a quick comparison of the common sonar types:
| Sonar Type | Best Use Case | Visual Representation | Price Point (General) |
|---|---|---|---|
| 2D CHIRP | Locating fish in water column, depth, bottom hardness | Arches, broad schools, strong/weak bottom lines | Standard, included in most units |
| Down Imaging | Detailed views of structure directly below, fish on/in structure | Photo-like images of trees, rocks, fish as dots | Standard in most mid-range units |
| Side Imaging | Scanning wide areas for offshore structure and fish | Map-like view of bottom to sides of boat | Premium, sometimes entry-level in sub-$500 |
Top Picks: Best Fish Finders Under $500 for Oklahoma Reservoirs
Now that we know what to look for, let's talk about some general types of units you'll typically find in this budget that are perfect for tackling our diverse Oklahoma reservoirs. While specific models and prices fluctuate, these categories consistently offer great value and performance for under $500.
Entry-Level Units with Quality 2D and Down Imaging
Many of the major brands offer fantastic entry-level units that punch well above their weight when it comes to core sonar performance. These typically feature 5-inch or 7-inch screens, excellent 2D CHIRP sonar, and crystal-clear down imaging. They often include basic GPS functionality, allowing you to mark waypoints and navigate with ease.
Think about the angler who frequently targets crappie around submerged brush piles in Grand Lake or follows creek channels for bass on Lake Eufaula. A unit with a sharp 2D and down imaging view will give them all the information they need to effectively find and catch fish. These units are also fantastic for kayak anglers, offering powerful features in a compact package that's easy to mount. Best Kayak Fish Finder for Oklahoma Reservoirs might lead you to some great compact options in this price range. You can often find these models readily available at big box outdoor stores like Bass Pro Shops or online retailers such as Amazon. Keep an eye out for bundles that include a quality transducer, as that's where a lot of the value lies.
Stepping Up: Units with Limited Side Imaging (When Deals Emerge)
This is where the hunt gets exciting! Occasionally, you'll find manufacturers offering slightly older models or stripped-down versions of their side imaging units just under or right at the $500 mark. These typically feature a 7-inch screen and, crucially, include side imaging capabilities along with 2D CHIRP and down imaging. The side imaging might not be as powerful or have the same range as their flagship models, but it's still a significant advantage for covering water.
Imagine you're searching for hidden offshore humps or rock piles on Lake Texoma that might be holding striped bass or even walleye. Side imaging allows you to scan wide areas quickly, revealing structure that you might have otherwise missed. For an angler who loves to explore and find new fishing spots, a unit with this capability can be a game-changer. These opportunities tend to be more fleeting, often appearing during sales events, so it pays to keep an eye on retailers like Bass Pro Shops and Amazon throughout the year.
The Value of Refurbished or Older Generation Units
Don't shy away from looking at refurbished units or models from a year or two ago. Electronics advance quickly, but last year's technology is often still incredibly capable and can be had at a significant discount. A refurbished unit, typically tested and certified by the manufacturer, can offer high-end features like side imaging that would normally be out of your price range if bought new.
Many reputable dealers and even manufacturers themselves sell refurbished units with a warranty. This is a fantastic way to stretch your budget and get more features for your money. You might find a unit with an 8-inch screen and full suite of sonar technologies that was originally $700-$800, now available for under $500. It's a smart strategy for the savvy angler who wants premium performance without the premium price tag. Just make sure to check the warranty details carefully before purchasing.
Setting Up Your New Fish Finder for Success
Getting your shiny new fish finder isn't the end of the journey; proper installation and understanding its basic functions are crucial for actually finding fish. A poorly installed transducer or a screen cluttered with confusing settings won't help you much, no matter how good the unit is. Taking the time to set it up correctly will ensure you're getting the most accurate information possible from your investment.
Installation Tips for the DIY Angler
Most fish finders designed for small boats or kayaks come with fairly straightforward installation instructions. The main components are the head unit (the screen), the power cable, and the transducer.
- Mounting the Head Unit: Choose a spot on your dash or console that's easily visible from your fishing position but doesn't obstruct your view or interfere with steering. Make sure it's secure and won't bounce around in choppy water. Many units come with a quick-release mount, which is great for removing it at the end of the day to prevent theft or protect it from the elements.
- Running Power: Connect the power cable directly to your boat's battery, if possible. Avoid tapping into existing accessory circuits if they're already heavily loaded, as this can cause interference and poor performance. Make sure to use an inline fuse as recommended by the manufacturer to protect your unit.
- Transducer Placement: This is arguably the most critical step. For a transom-mounted transducer (the most common type for under $500 units), you need to find a spot on the transom where the transducer face is fully submerged in clean, turbulent-free water, especially when you're on plane. If it's too high, you'll lose bottom readings at speed. If it's too low, it can create excessive spray or even be damaged. Experiment with the angle slightly to get the best readings. For kayaks, through-hull or scupper mounts are popular, ensuring the transducer is always in contact with the water. A good installation here means your fish finder can effectively tell you How a Fish Finder Helps You Find Structure on Oklahoma Reservoirs.
Basic Settings and Interpretation
Once installed, don't just hit the water and expect magic. Spend some time in your driveway or on the water in a quiet cove to get familiar with the basic settings.
- Sensitivity/Gain: This controls how much detail your sonar picks up. Too low, and you'll miss fish. Too high, and you'll get a lot of clutter. Start in auto mode, then experiment by slowly increasing it until you see a little bit of clutter, then back it off slightly.
- Depth Range: Your unit will usually auto-range, but sometimes setting it manually can give you a better view of the bottom or specific depth you're targeting.
- Scroll Speed: This dictates how fast the sonar image moves across the screen. A faster scroll speed can be good for finding schools quickly, while a slower speed can help you analyze structure in more detail.
- Color Palette: Most units offer different color schemes. Choose one that's most comfortable for your eyes and helps you distinguish between fish, bait, and structure. Brighter colors usually indicate stronger returns.
The key to interpreting what you see is practice. The more time you spend watching your screen, comparing it to what you know is below (like a visible brush pile or a known depth change), the better you'll become at understanding those arches, dots, and photographic images. Don't be afraid to read your owner's manual – it's full of valuable insights! Before long, you'll be confidently navigating and targeting fish with precision, making your fishing trips much more productive.
Disclaimer
This article is for general informational purposes only and does not constitute professional advice. Laws, prices and regulations vary by location and change over time. Consult a qualified professional for guidance on your specific situation.